If you’re looking to start a fashion brand, which doesn’t buy and resell products, then you’ll need to make something. That means dealing with factories and going through a sampling process. This is something that I get a lot of questions about, because it’s often misrepresented or not explained properly and needs some clarity on how things work.
So in this post, I’m going to give you a rundown of the sampling process and what you should be expecting at each stage. By the time you finish this post, you should have a clear outline of the sampling process, what you should ask for and what you should expect.
A SAMPLING PROCESS
The point of the Sampling Process is to perfect the idea that you have, by getting samples from the factory or people that will produce your final products. In other words, you ask your factory to produce sample after sample, until you have the product you are happy with.
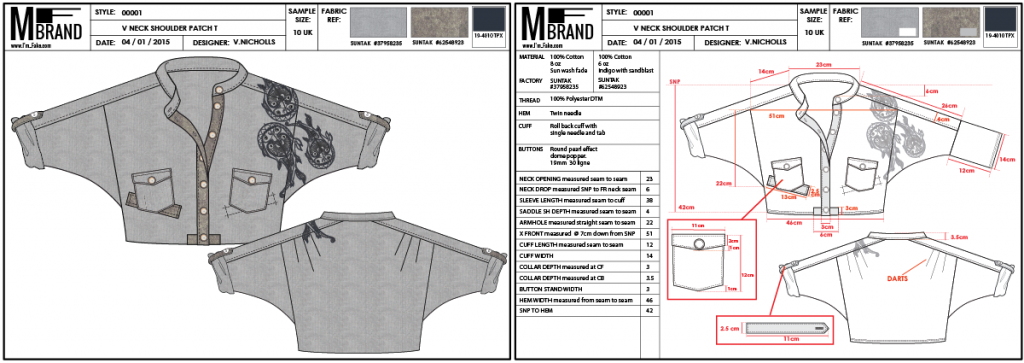
The time that this takes and the amount of samples you will need, depends on the quality of the information you give your factory at the beginning. The information given, is usually in the form of a Tech Pack, or Technical Pack. The quality of your Tech Pack will determine how much time, cost and stress you have throughout. I won’t cover Tech Packs here, since there are many posts already, but I do suggest you take a look at them thoroughly [you can find these listed below] , or if you want to do them yourself, have a look at my 268 page E-book Tech Packs for Fashion.
Essentially, your Tech Pack is at the start of this process and will give clear instructions to your chosen factory, on what they should make and how to proceed on your journey.
Although each product and brand are different, the stages that every sample goes through, from receiving your first sample to production, are the same. There are four key samples that you will receive during this process:
- Initial Sample
- Pre-Production Sample
- Size Set
- Production
I should note however, that if you have ever worked in retail you may have heard alternative names for them, such as ‘Red Seal’, ‘Salesman Sample’ or ‘Fit Sample’. These are just names that get bounced around or adopted by companies, but are in fact, the same as the four manufacturing terms above.
The product that you create your Tech Pack for, will go through these four sample stages as it moves from an idea to being mass produced and although there are only four samples to receive overall, the sampling process itself is a little more complicated.
Sampling and production for each garment will depend on many factors, such as your design and how complicated it is, or whether you are having an embellishment added, or a fabric specifically printed. But regardless of the design or the product, it all starts with a Tech Pack, and works as follows:
START AT THE BEGINNING…… TECH PACK
Depending on how far away your factory is from you and what you need to send them, will determine how long this part of the process will take. If you have to send something physical, like a fabric swatch, then the post can’t be avoided and will obviously take longer to arrive at its destination, than an email. So this part can take anything from 5 minutes to a week.
However, part one of your journey is simply to send your Tech Pack to your chosen factory.
1st SAMPLE FROM THE FACTORY
After you send your Tech pack, you will receive a sample. This is called your Initial Sample. Factories can’t possibly have every single colour thread, or type of material, in stock and ready for your request. They have to order buttons, trims and anything else your design needs. So you have two options for your first sample. Speed or accuracy.
If your aim is speed and you just want to check the sample for fit alone, then the factory can substitute things like fabric and trims for a close substitute. The measurements will be a little rushed and you should expect a couple of them not to match your Tech Pack specifications.
If you can afford to wait for the proper components or want the exact match for everything you asked for, then you have to be prepared to give the factory some time. It will take longer to get your samples back, but it should be far closer to the product you want.
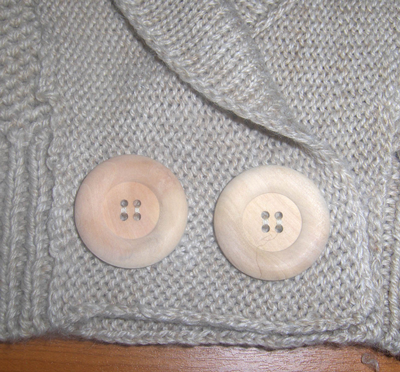
Overall you can expect a sample back in around ten days if it’s a simple design and you need a speedy return or anything up to three weeks for something more specific or complicated. In both cases, you will need to allow for postage time on top and possibly customs delays if your factory is overseas and the package they send you is very large.
1st SAMPLE COMMENTS
Regardless of whether you have asked for speed or accuracy, you will need to check your sample properly against the specifications in your Tech Pack. This includes the design details, quality and measurements, as well as anything else you asked for in your Tech Pack, bearing in mind that as an initial sample, it may not be completely accurate.
If the sample is perfect, then apart from being really lucky, you’ll also be able to ‘Approve’ or ‘Sign Off’ the sample. Meaning that you tell the factory you are happy with it and they can move onto the next sample stage, or Pre Production Sample.
If you’re not happy, or there are corrections to be made, which is usually the case with a rushed Initial Sample, you will need to give comments on anything you want to change or improve. Terminology wise, this part is simply called ‘Comments’.
You should make some time to take photos of anything that is visible, as well as making written comments for every area that needs improvement or changes. Comments can be given to your factory via email, which is good enough for record keeping, but the preferred method is to make a copy of the original Tech Pack and add/change your notes, instructions or measurements, saving this new file with the current date on every sheet. Remember to highlight anything that is different or needs changing from the 1st Tech Pack you sent.
After your comments are received by the factory, they will make sample number 2.
The process of sending comments to the factory and then receiving other samples based on your new comments, will repeat until you are happy with your sample.
NOTE #1 ON INITIAL SAMPLES
As a side note, factories tend to rush first samples in general, which means there will be mistakes, especially for the first sample. This is completely normal.
It will be up to you to check your sample properly and comment thoroughly on anything that needs improving. When the factory knows that you’re serious about placing an order with them, samples tend to be more accurate and Tech Packs get read more thoroughly.
If Tech Packs are done properly first time round and you give thorough comments about the first sample you receive, your second sample should be exactly what you want. Your factory will correct anything that might have happened due to them rushing.
Really by sample 2, you shouldn’t have to do any more comments or ask for more samples. In the retail world, sample 2 should be exactly what you want and designers needing additional samples, don’t tend to last very long. Sampling costs money after all. However, mistakes and delays do happen, even to the most experienced designers or well-staffed brands, so it’s important to be realistic too. If you are new to sampling, you may need a couple more samples and comments. Don’t worry though. As you gain more experience, you’ll cut down the amount of samples you will need.
NOTE #2
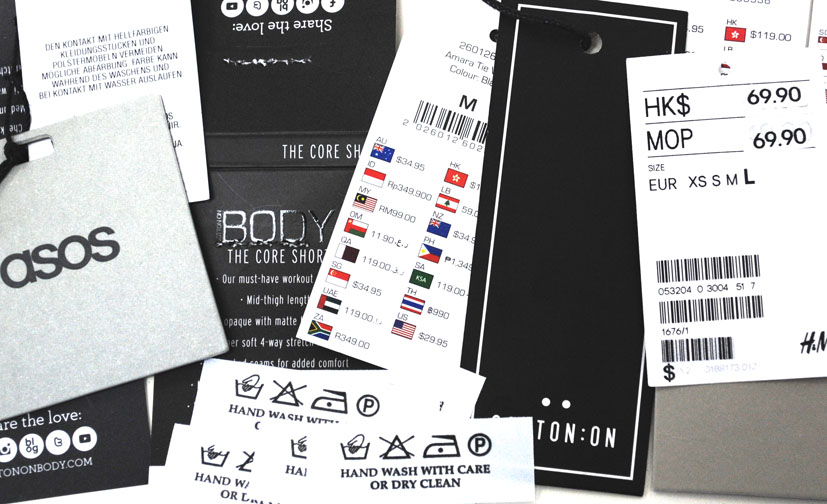
Depending on the product you are making, you might have labels, swing tags, embroideries, prints, technical fabric effects, packaging, wash care labels and so on. Throughout the sampling process, you should be sending artwork for these items and asking for samples of these things too.
You should check each item for accuracy against the Tech Pack or artwork information you gave the factory.
Check each item specifically for:
- Size
- Layout
- Placement
- Colour
- Quality
- Finishing
- Materials
There is no specific time that this part of your sampling process happens. Factories will arrange for these items to be sampled for you and they could arrive with your initial sample [which would be very unusual unless you wait a long time] or later on in the process. This will just depend on how efficient your factory is and how much you remind them about these items. But, like garments, you will have to either ‘Approve’ or ‘Sign Off’ each of these trims and components, or repeat the ‘sample and comment’ process, if you’re not completely happy.
PRE PRODUCTION SAMPLE
Whatever sample you are happy with, second, third or so on, this sample is then Signed Off or Approved as you already know. The version that you have Approved, then becomes known as a Pre Production Sample and simply gets re-named, so you should only approve your sample [ making it a Pre Production Sample ] when you are completely happy with your product.
This sample should be complete with trims, prints and various other things you have Approved in your design process, however packaging and hangtags that are additional to the product, may or may not be included. This will depend on your factory.
If you have been working on your samples purely for the fit and your current sample does not include trims, prints and so on, you should request a full Pre Production Sample, complete with all details added.
Your Pre Production Sample is the one that all further samples will be compared to. It sets the standard for what you ask your factory to produce as a bulk order, so it is really important to check every measurement and detail. From this sample onwards, there shouldn’t be any more design or fit alterations and all further samples you receive are essentially there to double check production quality and grading for all other sizes.
This sample can also be called a Salesman Sample by suppliers, because it is traditionally the one shown to buyers for selling products.
NOTE #1 PRE PRODUCTION SAMPLE
From the Pre Production Sample onwards, you should be asking for at least two samples per garment, with all tags labels and so on.
One is for you to keep as a record of each sample stage. The second is to send out to buyers, press or anyone else you need to. Since samples have a habit of ‘going missing’ when you are sending them out to people, it’s important to always have an original somewhere just for you.
Larger retailers occasionally ask for multiple samples from the beginning of the sampling process and often ask for three samples rather than two, mainly because samples have to be in various meetings, or with various staff, at any one time. You can do this as well, but you may need to consider the cost of the additional samples, especially if you will be making changes or the factory do not get the sample right first time round.
Your factory will also make an additional sample which stays at the factory and is a record of fit for each sample stage. They keep this sample so that when you make your comments, the factory has an exact replica of the physical garment for reference. These are called Counter Samples. All samples sent to you and kept by the factory, are made at the same time, with the same fabric, same machines etc, so they are an exact match.
SIZE SET
So now that you’re Pre Production Sample has been finalised and you are happy with your product, the next sample is about checking sizes rather than making further changes to design or fit.
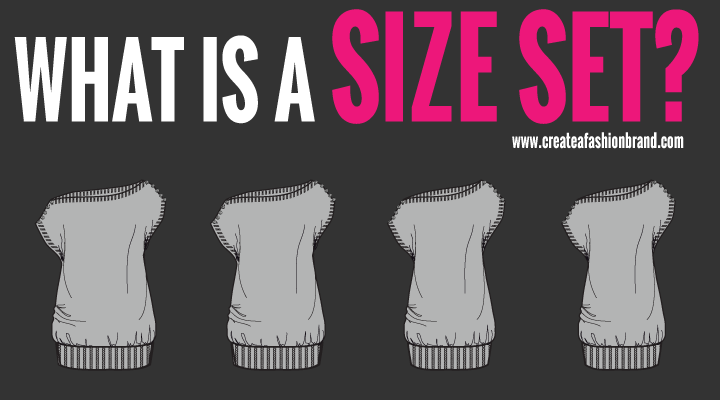
Up to this point, you’ve been working with 1 size for sampling. What that size is, is your choice, but it will be consistent throughout the process. Now you need something called a ‘Size Set’, which is exactly how it sounds. You ask the factory to produce two samples in every size you are planning to manufacture. These samples then get sent to you and as before, you check each and every measurement.
If your Tech Pack has a Grading Sheet [a table of measurements given for every size], then the samples you receive should match the table in your Tech Pack.
At this stage of the process, it should be a simple case of confirming what has been written down. If you do need to make comments or changes, then you can still do so, but this shouldn’t be necessary at this stage.
Like the Pre Production Sample, these should be complete samples with all labels, tags etc…
PURCHASE ORDER
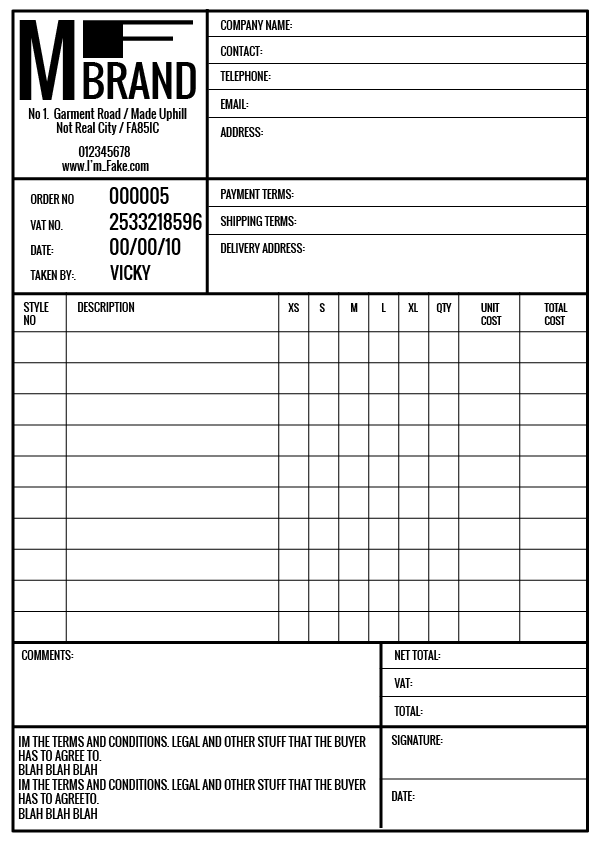
A Purchase Order [ or PO ] is the order that you place with your factory for them to manufacture your bulk garments. It is a legal contract between you and your factory and lists everything that you want them to make.
You should be as specific as possible in terms of fabrics, trims, sizes, delivery, payment options and so on, because once it is signed by you, there is no going back.
This is a legal and binding contract, so you need to make sure you triple check the details on it. You should never sign and send this document [which you have to create] until you haveapproved your samples, which includes all labels, swing tags, packaging etc…
I won’t go into the details of a PO here, but I should mention that there is an additional post BUYERS & WHOLESALE: WHAT’S A PURCHASE ORDER? And you can look at that HERE
PRODUCTION SAMPLE
Your Production Sample is the last sample that you will receive. It comes to you when you have placed your order with your factory for your mass or bulk production.
When the factory are making the garments you require for your order, they take two garments [ or as many as you request ] out of the production line, finished with packaging and labelling and send it to you for your records. Your Production Sample should be exactly what you are expecting and what you have placed an order for.
If there is something wrong with the production sample, [ which is shouldn’t happen at this stage if you have checked your garments properly throughout] you need to contact the factory immediately to stop the production.
As long as you have kept records of everything you Signed Off, the factory is liable for any remaking costs that might occur if they make a mistake. If you have Signed Off something that you don’t like, or change your mind, unfortunately this will be your responsibility to pay for and correct.
Your order or Purchase Order is a legal contract between you and your factory, so liability is solely down to who made the mistake and what was agreed.
FINALLY….
So now we have gone through the sampling process as a whole, including the Initial Sample, Comments, Pre Production Sample, PO and Production Sample, you should now have an overview of how you you will proceed with sampling.
It’s important to look through the additional notes and understand that this is an overview. Much of your time, cost and stress will depend on the quality of your Tech Packs; the attention you pay to checking your samples as well as the contact and relationship you have with your factory.
It’s important to know as well, that things like Purchase Orders and Tech Packs, have their own set of structures and regulations. You will need to research into many of these things to make sure that they are done well and in terms of the PO, you are legally covered and protected.
So in that vein, let’s move onto the actions steps
Action Steps:
To help with further reading and developing your journey, here are some additional resources that you will find useful.
RESOURCES:
- DRESSMAKING IS NOT RETAIL STANDARD
- WHAT DESIGNER SHOULD I CHOOSE? CHEAP OR EXPENSIVE?
- QC YOUR FASHION SAMPLES LIKE A PROFESSIONAL GARMENT TECH
- WHAT IS A GARMENT SIZE SET?
- TECH PACK VS SPEC SHEET. WHAT’S THE DIFFERENCE?
- TECH PACKS: WHAT ARE THEY AND WHAT’S INSIDE?
- [E BOOK] HOW TO CREATE TECH PACKS FOR FASHION
- 4 TIPS TO HELP YOU CHOOSE A GOOD GARMENT FACTORY
- BUYERS & WHOLESALE: WHAT’S A PURCHASE ORDER?
- TERMINOLOGY: THE MAIN 6 DELIVERY TERMS [ TERMS OF SALE ] EXPLAINED
